Have you ever uploaded a perfectly sharp photo to a website, only to discover that the page became painfully slow or the platform rejected the file because it was too large? I’ve found that image files are often one of the easiest things to improve, yet people frequently attack the problem from the wrong direction: they compress harder instead of optimizing smarter.
A good free image compressor should do more than make a 2 MB image into a 500 KB file. It should help you find the right balance between file size, visual quality, dimensions, format, privacy, and actual use case.
That distinction matters.
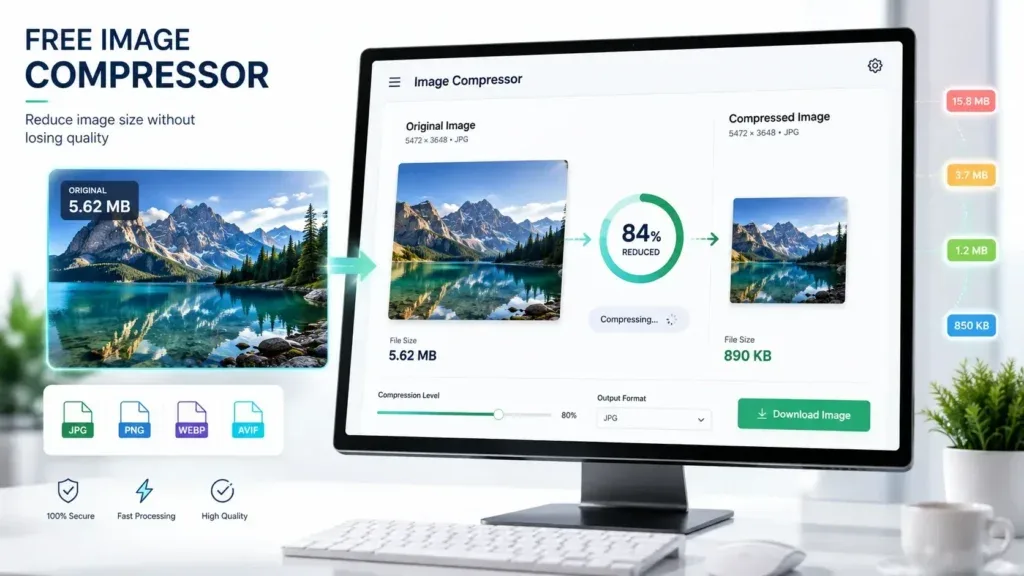
A 1200 × 800 photo that looks nearly identical at 450 KB can be a much better web asset than a 5000 × 3333 original at 1.8 MB. On the other hand, aggressively compressing a screenshot containing small text can make the image visibly worse even when the percentage reduction looks impressive.
I approach image compression as an optimization problem rather than a race to the smallest possible file.
That approach becomes especially useful for WordPress websites, blogs, ecommerce stores, social media images, portfolios, documentation, and anyone working with large collections of photos.
This guide explains how free image compression actually works, which formats make sense, which tools are worth using, how to reduce image size online, and how to avoid the mistakes that create blurry or unnecessarily heavy images.
What Is an Image Compressor?
An image compressor reduces the amount of digital data required to store or deliver an image.
The original image contains information that may not all be necessary for the intended viewing situation. Compression algorithms identify ways to represent that information more efficiently.
There are two broad approaches:
Lossy image compression
Lossy compression removes some image information to achieve a substantially smaller file.
JPEG is a classic example, while lossy WebP and AVIF can also provide strong compression.
This approach is normally suitable for:
- photographs
- blog featured images
- travel pictures
- product photography
- social media graphics
- website banners
- ordinary screenshots without tiny text
The key is controlling how much information is discarded.
Lossless image compression
Lossless compression reduces the file size without permanently removing image information.
PNG is often used when exact reproduction matters, particularly when transparency or sharp graphic elements are involved.
Lossless compression is useful for:
- logos
- screenshots
- icons
- diagrams
- interface graphics
- images containing precise text
- graphics where every pixel matters
The important point is that smaller is not automatically better. The correct compression method depends on what the image contains and where it will be used.
Why Should You Compress Images?
When I look at an image optimization problem, I don’t start with the compressor. I start with the reason the file needs to be smaller.
There are several practical reasons.
1. Faster website loading
Large image resources require more bytes to be downloaded.
Google’s web performance guidance identifies image resources as common contributors to Largest Contentful Paint (LCP), particularly when the primary content visible in the viewport is an image. Google recommends reducing resource size and using efficient image formats as part of image performance optimization.
A smaller image can therefore reduce the amount of data the browser needs to transfer.
That does not mean compression alone guarantees a good Core Web Vitals score. Server response time, rendering, JavaScript, image discovery, caching, and layout also matter. Google’s documentation explicitly notes that LCP has several components and shouldn’t be treated as a single-image problem.
2. Better mobile experience
Mobile visitors don’t always have fast connections or unlimited data.
Sending a huge desktop-sized photograph to a phone that displays it at a much smaller physical size wastes bandwidth.
This is why I think about two separate questions:
How large is the file?
and
How large does the image actually need to be?
Both matter.
3. Lower storage and bandwidth usage
If your website contains hundreds or thousands of images, unnecessary file size can add up quickly.
A 500 KB saving repeated across 2,000 images represents roughly 1 GB of storage reduction before accounting for additional derivative files, backups, and delivery traffic.
4. Easier uploads and sharing
Compressed images are also more convenient for:
- email attachments
- application forms
- government portals
- online marketplaces
- messaging platforms
- cloud storage
- social media uploads
Many platforms impose upload-size restrictions.
Free Image Compressor vs Image Resizer: What’s the Difference?
This is one of the most common points of confusion.
Compression changes how efficiently image data is stored.
Resizing changes the image’s dimensions.
Suppose your original photo is:
6000 × 4000 pixels — 8 MB
You could compress it and perhaps reduce the file size substantially while keeping those dimensions.
But if the image will only appear at 1200 pixels wide on your website, keeping 6000 pixels is often unnecessary.
A smarter workflow may be:
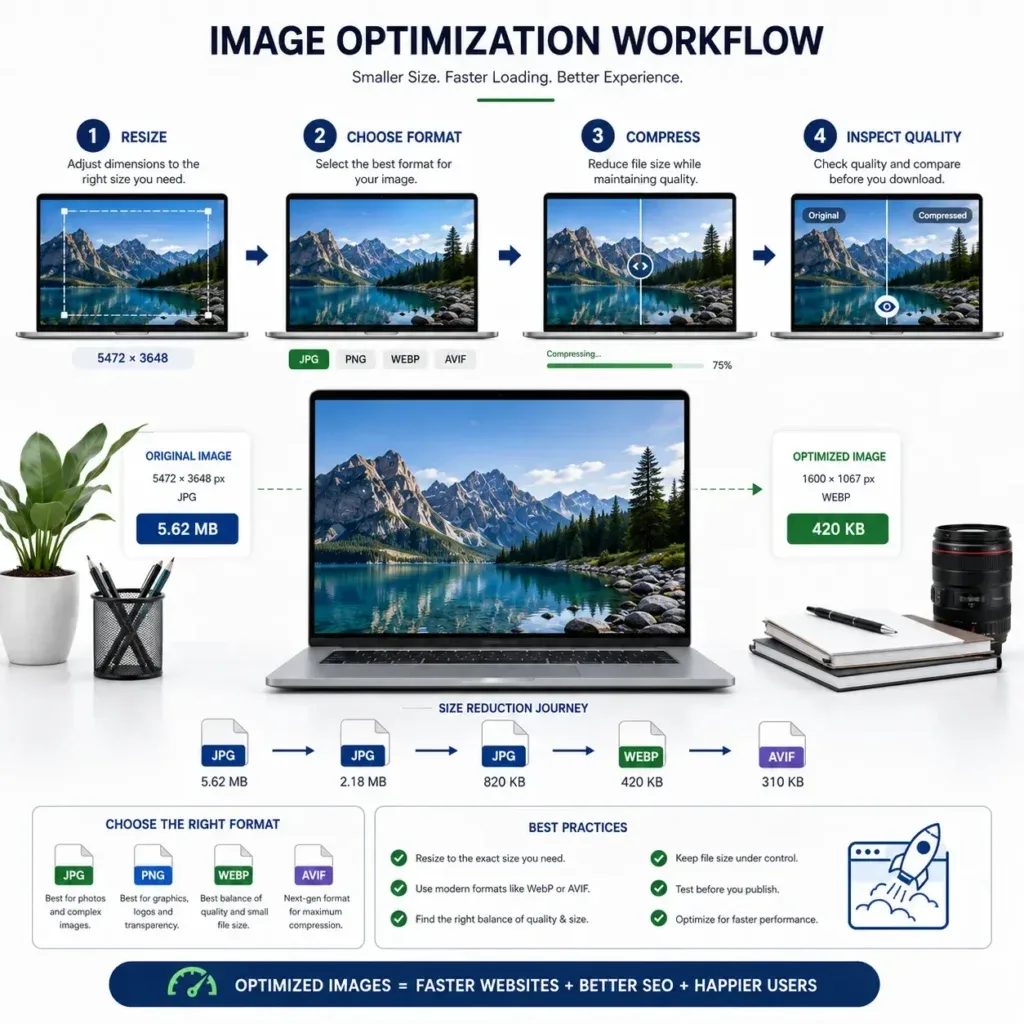
Resize → Convert → Compress → Inspect → Publish
That sequence often produces a much better result than simply crushing the original file with an aggressive quality setting.
What Is the Best Free Image Compressor?
There isn’t one universal winner because different tools prioritize different workflows.
A useful comparison looks like this:
| Tool | Best For | Free Capability | Local Processing | Formats / Features |
|---|---|---|---|---|
| Squoosh | Manual control and privacy | Yes | Yes | WebP, AVIF and multiple codecs |
| TinyPNG / Tinify | Quick everyday optimization | Yes | No | JPEG, PNG, WebP, AVIF and conversion |
| ShortPixel Online | Compression plus conversion | Yes | No | JPG, PNG, GIF, WebP, AVIF |
| Your own browser-based compressor | Privacy-focused workflows | Depends on implementation | Can be | Depends on tool |
Squoosh is particularly interesting for privacy-sensitive work because its website states that processing happens locally on the user’s device and that images do not leave the device.
TinyPNG currently allows free users to upload up to 20 images at once, with a maximum size of 5 MB per image, and offers conversion options including AVIF, JXL, WebP, JPEG, and PNG.
ShortPixel’s online compressor supports JPG, GIF, and PNG and can generate WebP and AVIF versions, with lossy, glossy, and lossless settings. Its published online tool limit is 10 MB per file without login.
The lesson is simple: choose the compressor based on the job, not just the percentage shown beside the download button.
Squoosh vs TinyPNG vs ShortPixel
Squoosh
I like Squoosh when I want to see exactly what the compression settings are doing.
Its interface allows you to inspect the original and optimized result and adjust settings manually. More importantly for sensitive images, Squoosh says that the processing is performed locally in the browser.
That makes it useful for:
- private photos
- screenshots containing personal data
- developer assets
- experiments with WebP and AVIF
- users who want more control
The trade-off is that manual control can feel less convenient when processing large batches.
TinyPNG
TinyPNG is easier for quick, routine compression.
Its current free web compressor supports batches of up to 20 files with a 5 MB-per-file limit. It supports image compression and conversion for several modern formats.
It is a strong choice when you want:
Upload → compress → download
without thinking too much about technical encoding settings.
ShortPixel
ShortPixel sits somewhere between a simple compressor and a more advanced optimization workflow.
Its online tool offers lossy, glossy, and lossless compression, resizing options, WebP generation, and AVIF generation.
That makes it useful when compression is only one step in a larger optimization process.
Which Image Format Should You Use?
The format often matters as much as the compressor.
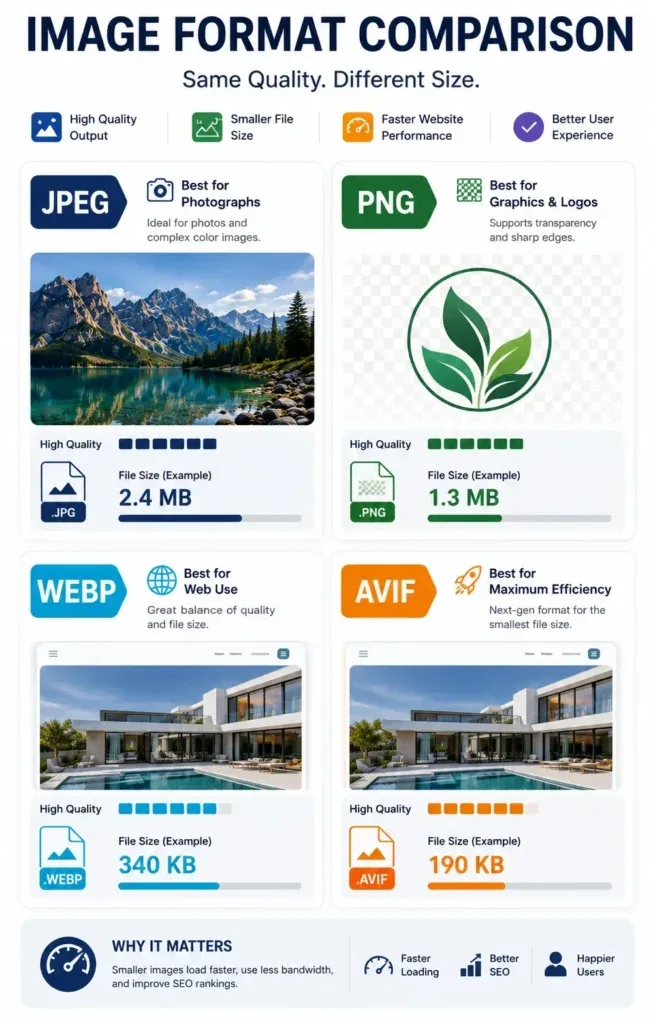
According to MDN’s current image format documentation, WebP generally offers substantially better compression than traditional JPEG and PNG while supporting features such as transparency and animation. AVIF can provide even stronger compression, although fallback considerations may still matter.
Here’s the practical version.
| Format | Best Use | Compression | Transparency | Practical Recommendation |
| JPG/JPEG | Photos | Lossy | No | Excellent compatibility |
| PNG | Graphics, screenshots | Lossless | Yes | Use when clarity/transparency matter |
| WebP | General web images | Lossy/Lossless | Yes | Strong default for many websites |
| AVIF | High-efficiency web delivery | Lossy/Lossless | Yes | Excellent when your stack supports it |
| SVG | Icons, logos, vectors | Vector | Yes | Best for true vector artwork |
MDN describes WebP as an excellent choice for still and animated images and notes that AVIF can provide better compression, while also emphasizing browser support and fallback considerations.
JPEG vs WebP vs AVIF
This is where image optimization becomes more interesting.
A JPEG can be perfectly acceptable. There is no rule saying that every website must immediately replace every JPEG with AVIF.
But modern formats can produce smaller files for similar visual quality.
MDN reports that lossy WebP images are typically around 25–35% smaller than visually similar JPEG images, while lossless WebP can also reduce size relative to PNG.
AVIF can go further in many cases. However, the exact result varies by image content, encoder, and quality target.
This is why I prefer visual comparison over theoretical compression claims.
A photograph with a sky, grass, and skin tones can behave very differently from a screenshot containing black text on a white background.
How to Compress an Image Online for Free
Here’s the workflow I recommend for most everyday images.
Step 1: Check the original file
Before uploading anything, look at:
- file type
- dimensions
- file size
- transparency
- whether the image contains text
- whether the image contains sensitive information
A 7 MB photograph and a 7 MB screenshot should not necessarily be processed with the same settings.
Step 2: Decide the target dimensions
Ask where the image will actually appear.
For a blog featured image, perhaps you need something around 1280 pixels wide.
For a small content image, a much smaller width may be sufficient.
Don’t automatically resize every image to the maximum possible resolution.
Step 3: Pick the right format
Use JPEG, WebP, or AVIF for many photographic images.
Use PNG when lossless quality or transparency is important.
Use SVG for actual vector artwork rather than turning it into a giant raster image.
Web.dev similarly recommends JPEG, lossy WebP or AVIF for photo-like raster images and SVG for graphics that can be represented as vectors.
Step 4: Compress
Start conservatively.
For example, with a JPEG or WebP photograph, don’t immediately jump to extremely aggressive compression.
Look at the result.
Step 5: Compare visually
Zoom into:
- faces
- text
- hair
- fine textures
- edges
- gradients
- shadows
The goal isn’t to achieve the biggest percentage reduction.
The goal is to achieve the best quality-to-size ratio.
Step 6: Download and test
For websites, upload the optimized image and test the actual page.
That’s important because image optimization is ultimately about user experience, not just the number displayed by the compressor.
How Much Should You Compress an Image?
There is no universal percentage that works for every image.
A common mistake is saying:
“Compress every image by 80%.”
That advice sounds useful but ignores how different image types behave.
A simple blog photograph might tolerate a substantial reduction.
A screenshot containing small interface text may not.
A logo with transparency may require lossless treatment.
An illustration with flat colors may compress differently from a highly detailed photograph.
Instead, think in terms of acceptable visual quality.
A practical starting point
For photographs:
- start with moderate lossy compression
- compare the result at normal viewing size
- inspect details at 100% zoom
- increase compression gradually
For screenshots:
- prioritize text clarity
- consider PNG or carefully tuned WebP
- avoid aggressive JPEG compression
For logos:
- use SVG when possible
- otherwise consider PNG or WebP depending on transparency requirements
For website hero images:
- resize first
- choose a modern format
- compress moderately
- test the actual LCP image
Why Compressing a Huge Image Isn’t Enough
This is one of the biggest optimization mistakes I see.
Imagine a blog displays an image at roughly 1200 × 800 pixels.
You upload a 6000 × 4000 pixel original and run a compressor.
Even if the compressor reduces the file from 7 MB to 1 MB, you’re still delivering an image with far more pixels than the page may require.
In that situation:
Resize + compress
is usually more sensible than:
Compress only
Responsive image delivery can take this further by allowing browsers to select an appropriate resource for the display context. MDN’s <picture> documentation explains how browsers can choose among supplied image sources based on format and conditions.
Image Compression and WordPress SEO
For WordPress publishers, image optimization affects more than media-library organization.
Images can influence page performance, usability, and how search engines understand visual content.
Google Search Central recommends descriptive filenames and useful alt text. Google says filenames provide clues about subject matter, while alt text helps Google understand images and improves accessibility. It also warns against keyword stuffing in alt attributes.
That means a filename like:
IMG_93847.jpg
is less informative than something like:
free-image-compressor-guide.webp
assuming that accurately describes the image.
The same principle applies to alt text.
Bad:
“free image compressor image compressor compress image online image compression”
Better:
“Interface showing a free image compressor reducing a large JPG file”
The second version is more useful to both people and search systems.
Does Image Compression Improve Google Rankings?
This needs a careful answer.
Compressing an image is not a magic ranking button.
Google evaluates many signals, and page experience involves more than image size.
However, image optimization can contribute to better performance, particularly when images are responsible for substantial network transfer or are part of the LCP element. Google’s Core Web Vitals guidance sets a good LCP target at 2.5 seconds or less at the 75th percentile.
So the more accurate SEO strategy is:
Optimize images because they are part of the overall performance and user-experience system.
Not:
Compress an image and expect rankings to increase automatically.
That’s an important difference.
A Better Image Optimization Workflow for Bloggers
For a content-heavy website, I recommend turning compression into a repeatable publishing process.
Before publishing
- Choose the correct image dimensions.
- Select an appropriate image format.
- Compress the image.
- Rename the file descriptively.
- Add natural alt text.
- Add width and height attributes where appropriate.
- Use responsive image delivery.
- Check the image on mobile.
- Test page performance.
This workflow scales much better than manually fixing oversized images after pages are already published.
What I Look for in a Good Free Image Compressor
When I evaluate an image compression tool, I don’t just look at how many megabytes it removes.
I look at six things.
1. Compression quality
Does the image still look good?
2. File-size reduction
How much data was actually removed?
3. Format support
Can it work with JPEG, PNG, WebP, and AVIF?
4. Batch processing
Can you process multiple images without repeating the entire workflow?
5. Privacy
Are uploaded images transferred to a server, or does processing happen in the browser?
Squoosh is a useful example of a local-processing approach because its site explicitly says images never leave the device.
6. Control
Can you change:
- quality
- dimensions
- output format
- metadata
- compression mode
A beginner may want one-click optimization, while a designer or developer may want granular control.
Is It Safe to Use an Online Image Compressor?
Sometimes.
The main question is what happens to the uploaded file.
For ordinary website images, an established compression service may be completely reasonable.
For private material, however, I would pay more attention to the processing model.
Think carefully before uploading:
- identity documents
- private contracts
- confidential screenshots
- personal photographs
- financial documents
- unreleased product designs
A browser-based tool that processes locally can be attractive for sensitive files. Squoosh explicitly advertises local processing for this reason.
Always read the provider’s current privacy and retention policies rather than assuming every “free image compressor” handles files the same way.
How to Compress JPG Without Losing Too Much Quality
JPEG is still extremely useful.
For a photograph:
- Resize it to the required dimensions.
- Choose JPEG or a modern alternative such as WebP/AVIF.
- Start with moderate quality.
- Inspect faces, edges, and textures.
- Increase compression until artifacts become noticeable.
- Step back slightly from that threshold.
JPEG is particularly effective for photographs because its compression model is designed around photographic image characteristics.
But remember that JPEG is lossy. Repeatedly opening and recompressing the same JPEG can gradually degrade it.
Keep the original master file.
How to Compress PNG Images
PNG is different.
If your image contains:
- transparency
- sharp text
- UI screenshots
- flat-color illustrations
- logos
PNG can be a sensible choice.
But a common mistake is storing enormous photographic images as PNG when the transparency or lossless requirement isn’t necessary.
In that case, WebP or AVIF may provide a much smaller file, depending on the image and delivery environment. MDN recommends considering newer formats when they offer better compression while also taking compatibility requirements into account.
WebP Compression: Is It Worth Using?
For many websites, yes.
WebP supports both lossy and lossless compression and supports transparency and animation. MDN describes it as an excellent choice for web imagery, with broad support across modern browsers.
For a typical WordPress blog, WebP can be a very practical middle ground:
Better efficiency than older formats + broad modern-browser support + useful features.
That doesn’t mean every file should be converted blindly.
Always compare the output.
What About AVIF?
AVIF is one of the most interesting formats for high-efficiency image delivery.
It can offer very strong compression and supports features including transparency, HDR and wide color gamut. MDN notes that AVIF can outperform JPEG and WebP on compression in many scenarios, while also pointing out that fallback strategies can be appropriate where compatibility is a concern.
For advanced websites, an approach such as:
AVIF → WebP → JPEG/PNG fallback
can be useful.
The HTML <picture> element can be used to provide alternative sources so the browser can select an appropriate format.
For a small personal blog, however, you don’t need to complicate the stack just because AVIF exists.
Use the solution that fits your hosting, CMS, CDN, and audience.
Common Image Compression Mistakes
Compressing before resizing
A huge original still contains too many pixels after compression.
Fix: resize first when the source dimensions are significantly larger than the actual display requirement.
Chasing the smallest file
An image that is 90% smaller but visibly ugly isn’t necessarily optimized.
Fix: optimize for perceived quality per byte.
Using JPEG for every image
JPEG is excellent for photos but isn’t ideal for every graphic.
Fix: choose the format based on the content.
Converting everything to WebP or AVIF automatically
Modern doesn’t always mean appropriate.
Fix: compare formats and consider compatibility.
Ignoring privacy
Not every image belongs on an external upload service.
Fix: use a local-processing tool for sensitive material when appropriate.
Lazy-loading the LCP image
This can sound logical because lazy loading is good for below-the-fold images. But Google’s guidance specifically warns against lazy-loading the LCP image because it can delay resource discovery.
The right optimization depends on where the image appears.
The Best Free Image Compressor Depends on Your Goal
Here is the decision framework I would actually use.
| Your Goal | Best Approach |
| Compress one private image | Squoosh |
| Quickly compress a few normal website images | TinyPNG |
| Need compression + WebP/AVIF | ShortPixel or Squoosh |
| Need maximum control | Squoosh |
| Need batch processing | TinyPNG / ShortPixel |
| Need WordPress automation | Use a suitable WordPress optimization plugin |
| Need a sensitive image processed locally | Browser-based/local compression |
| Need the smallest web-ready asset | Resize + test WebP/AVIF + compress |
There isn’t a meaningful “best” tool without considering the use case.
Can You Compress Images on a Phone?
Yes.
The basic principle is the same:
resize → choose format → compress → inspect
On a phone, the most important thing is avoiding unnecessary full-resolution files.
A modern smartphone camera can produce images far larger than you need for:
- a blog thumbnail
- a profile image
- a WhatsApp attachment
- a product listing
- an online application
- a social post
Reducing dimensions before uploading can make a dramatic practical difference.
Free Image Compressor for Bloggers: My Recommended Workflow
For a normal WordPress publishing workflow, this is the process I would keep beside my content checklist:
Hero image
Use the dimensions required by the theme or social preview.
Content images
Resize according to the maximum displayed width rather than the camera’s original resolution.
Format
Use WebP or AVIF where appropriate, with suitable fallback handling.
Compression
Choose moderate compression and inspect the output.
SEO
Use a descriptive filename and useful alt text.
Performance
Don’t lazy-load the page’s key LCP image merely because other images should be lazy-loaded.
Verification
Run PageSpeed Insights or another performance measurement tool after optimization rather than assuming compression solved the entire performance problem.
This is much more reliable than obsessing over a single “compression percentage.”
A Simple Example
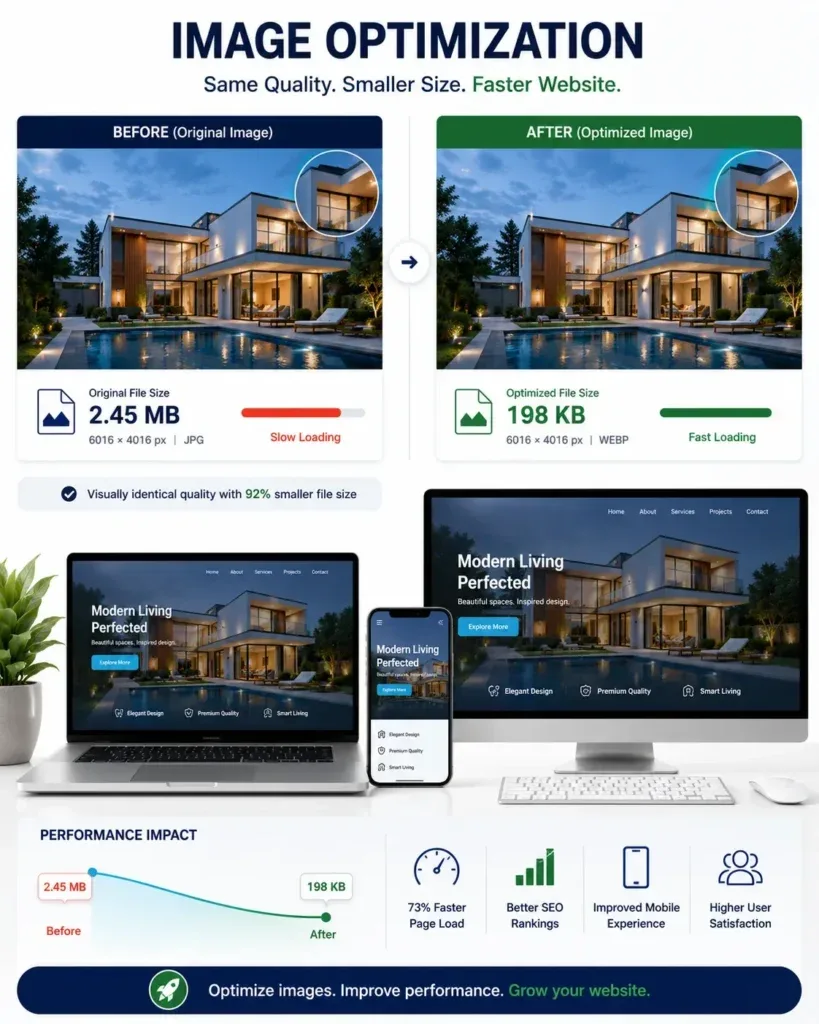
Imagine you have this original image:
Format: JPEG
Dimensions: 5000 × 3333
File size: 4.8 MB
You intend to display it inside a blog article at around 1200 pixels wide.
Instead of simply compressing the 4.8 MB file, you could create a version closer to the required display dimensions and then compare JPEG, WebP, and AVIF outputs.
Suppose the final candidates look like:
| Version | Approx. Size | Visual Result |
| Original JPEG | 4.8 MB | Excellent |
| Resized JPEG | 850 KB | Excellent |
| Resized WebP | 570 KB | Very good |
| Resized AVIF | 420 KB | Very good |
The smallest file isn’t automatically the winner.
If the AVIF version introduces visible artifacts in a particular image while WebP looks essentially identical to the JPEG, I’d choose WebP.
That’s what practical optimization looks like: measure, compare, choose.
Frequently Asked Questions
What is the best free image compressor?
For simple online compression, TinyPNG is convenient. For more manual control and local browser processing, Squoosh is especially useful. ShortPixel is another option when you want compression, resizing, and modern-format conversion in the same workflow. Current free limits and features can change, so check each service before relying on it for production workflows.
How can I reduce image file size without losing quality?
Resize the image to the dimensions you actually need, select an appropriate format, apply moderate compression, and visually inspect the result. For photos, WebP or AVIF can often provide strong compression; for graphics and transparency, PNG, WebP, AVIF, or SVG may make more sense depending on the source.
Is WebP better than JPG?
Not universally. WebP often provides smaller files at comparable visual quality and supports features such as transparency, but JPEG remains widely useful and compatible. Compare the actual output for your image rather than assuming one format always wins.
Is AVIF better than WebP?
AVIF can offer stronger compression in many cases, but the answer depends on the image, encoder settings, browser environment, and delivery strategy. AVIF is an excellent option for modern web delivery, especially when suitable fallbacks are available.
Does compressing images improve website speed?
It can. Smaller image resources generally require fewer bytes to transfer, and image resources are frequently relevant to LCP. But overall page speed also depends on server response, rendering, resource priority, caching, JavaScript, and other factors.
Should I compress images before uploading them to WordPress?
Yes, especially when you control the publishing workflow. Starting with appropriately sized and compressed files avoids storing and serving unnecessarily large originals and gives optimization plugins less work to do later.
Can I compress PNG without losing quality?
Lossless PNG optimization can reduce file size without changing image information, but the reduction may be smaller than with lossy techniques. If the source is a photograph and transparency isn’t required, WebP or AVIF may produce a substantially smaller result.
Is it safe to upload private photos to a free compressor?
It depends on the service and its processing and retention policies. For sensitive images, a browser-local compressor such as Squoosh can be preferable because its site states that images are processed locally and don’t leave the device.
What image size should I use for a website?
There is no single universal dimension. The right size depends on the maximum display size, responsive layout, device density, and how the image is delivered. Sending a 6000-pixel-wide image to a component that displays at 1000–1200 pixels is usually unnecessary.
Should I compress images to 50 KB?
Only when the image can still look good at that size; a fixed file-size target can cause overcompression. Focus on visual quality and actual page requirements rather than an arbitrary kilobyte number.
Does image compression affect SEO?
It can contribute indirectly to stronger technical performance and user experience, particularly when large images are slowing resource delivery. Image SEO also involves descriptive filenames, useful alt text, and relevant surrounding content. Google explicitly recommends descriptive image filenames and useful alt text while warning against keyword stuffing.
Conclusion
A free image compressor is useful, but the compressor itself is only one part of image optimization.
The workflow that consistently makes more sense is:
Choose the right dimensions → choose the right format → compress → inspect → deliver responsively → measure performance.
For a quick everyday task, a service such as TinyPNG can be convenient. For detailed control and local processing, Squoosh is particularly compelling. For broader optimization workflows, ShortPixel is worth considering.
The biggest lesson I’ve learned from thinking about image optimization is that the smallest possible image isn’t necessarily the best image.
The better target is the smallest file that still looks right, loads efficiently, and makes sense for the actual device and page where it will be used.
That is the difference between simply compressing an image and actually optimizing it.
| Free Image Compressor, Resizer & Converter | Click Here |